Search
Search
1361 results were found.
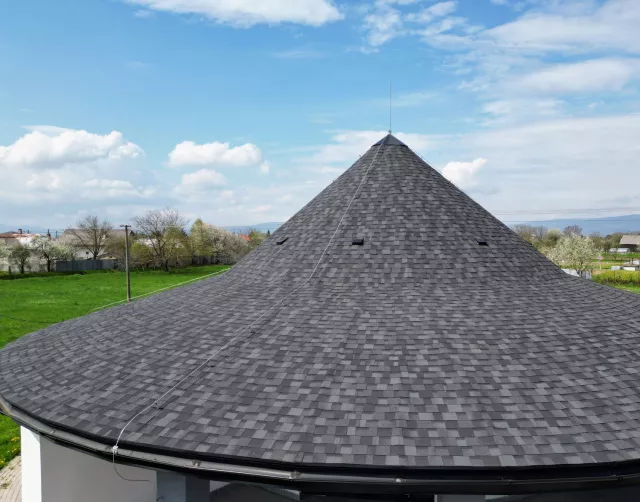
Installing shingles on cones, turrets, and special shapes
1. Preparation and Underlayment:
- Begin by applying IKO Armourbase Stick, a self-adhesive underlayment, directly to the roof deck. This underlayment seals around nails, reducing the risk of leaks that are common with the increased joints found in rounded roofs.

2. Shingle Cutting and Placement:
- The minimum width of a shingle should be at least half a tab.
- Trim shingles at the eaves to fit the curved edge.
- The length of the shingle depends on the circumference.
- Snap chalk lines from the peak center point to the eaves at intervals of one-half tab measured at the eaves.
- Gauging size to ensure that the shingles lay flat and fit uniformly between the chalk lines.

3. Adapting Shingle Size:
- As you move up the roof, shingle portions should become progressively smaller to match the narrowing circumference.
- Maintain a staggered side offset and align cutouts with every other course, following the chalk lines.
- Cut trapezoidal sections from shingles to fit between the narrowing vertical lines until the shingles are a minimum of half a tab wide at the lowermost edge of the shingle piece.

4. Precision and Stability:
- Each shingle piece should cover approximately three vertical lines. As the space between the lines narrows, increase the width of the shingle piece to cover five lines.
- Continue up the roof using wider sections when pieces become less than half a tab.
- Ensure cuts are straight to prevent gaps between joints.
- Secure each shingle piece with two nails and hand-seal with extra bituminous mastic.

5. Finishing Touches:
- For the peak, a metal cap or cone can enhance the appearance and simplify the finishing process.


Not sure if shingles are the right choice for your project?
Download our inspiration book and see how shingles fit with each style and shape!
Safety and Accessibility
Working on cone-shaped roofs can be hazardous due to their steep angles and height.
Safety should be a priority:
- Set up scaffolding around the base of the roof to provide a stable working platform. This will allow you to access all the areas, to store your shingle pieces and to lean a ladder onto the roof to support yourself on the cone while roofing it.
- Use IKO Roof brackets to improve movement and stability on the roof.
- Roofing a cone is labor-intensive and costly, so account for additional expenses, including scaffolding, in your project budget. It is faster and cheaper in the long run and will make the job come out better too.

