Search
Search
1361 results were found.
Perfect for all your architectural roofing projects!
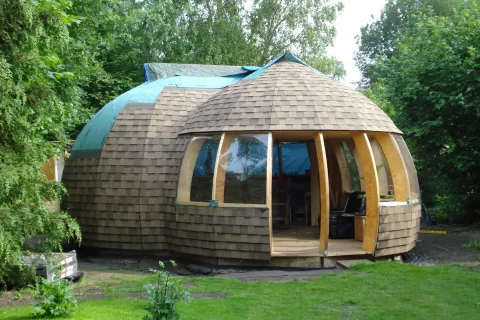
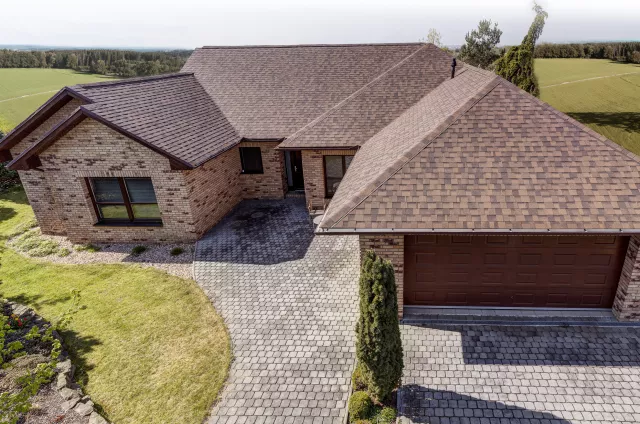
But why limit the use to the roof of your house? Cambridge Xpress is also suitable for many of your other roof projects. Looking for roofing material for your guest house design, boathouse roof, stable roof construction, carport, gazebo or wood pool house? For these types of classy buildings, people often tend to choose (cedar) wood shakes. Wood shingles offer a certain charisma and authentic look. IKO laminated roof shingles can easily recreate this same look and feel at a high quality, but at economical price. The natural colored granules and the unique shape of the shingle make Cambridge Xpress the ideal roofing solution to grant your elegant house, stylish stable roof, extraordinary pool house roof or your chic guest house roof the exclusive look you’ve always wanted.
Match your hips and ridges in the same colour
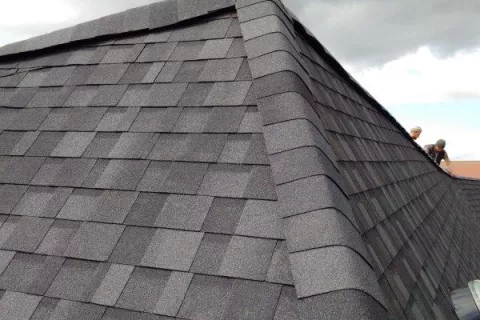
Our classic shingles Superglass is offered in the same natural colours as Cambridge Xpress, so it can function as hips and ridges for your roof. This way we can assure your roof will be completed in one perfect, authentic colour and style.
Best choice for your new roof or re-roof project
Thanks to its big size (which is easy for installation), IKO’s longtime experience and the use of excellent components (like its fiberglass, granules and bitumen), Cambridge Xpress is the option for your roof! And with a total warranty of 25 years (of which 15 years platinum warranty), you are guaranteed to enjoy your roof for decades!
Explore some more advantages on the most efficient laminated roof shingle:
- More coverage than any standard roof shingle.
- New Special Cambridge Xpress lane for faster application of the shingles.
- This extra large nailing area is known as the “Cambridge Xpress Lane”
- For improved nailing shingle performance especially on steep roofs.
- Available in 8 natural tones and contemporary colours
- Excellent solution for renovation projects…
- …and for any roof shape. Express your individuality!
Ideal solution for…
- Low slope wooden deck: Slopes between min. 4° and max. 15° need to be applied horizontally without the Armourbase Thermo AD being affixed mechanically on overlapsbeing affixed mechanically on overlaps.
- Concrete deck: Horizontal application without mechanical fixing on slopes between min. 4° and max. 15°. For steeper slopes (max. 45°), vertical application with mechanical fixing of the membrane with screws (+ metal plate) on the overlaps is mandatory.
- Thermal insulation on concrete / OSB shingle roof (min. 4°- max. 15°): The thermal insulation must be applied and mechanicaly fixed on the concrete deck or on the OSB deck only for slopes between 4° and 15°. In these cases Armourbase Thermo AD must also be fixed on overlaps because of the underlayment’s adherence to insulating elements.
- Renovation existing flat roofs (> 4°): (only if the roof is dry, clean and watertight) Primer AD + mechanical fixation needed to install this concept.
How to apply the torch on system?
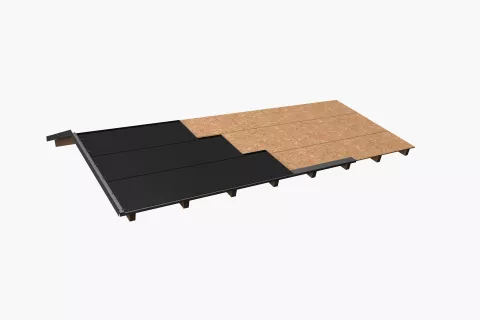
Application of the underlayment on a wooden deck
Apply the membrane parallel with the eaves - vertical and horizontal overlaps should be min. 10 cm. Set the roll of Armourbase Thermo AD and remove the release film from the back. In warm, sunny weather the underlayment will stick with the wooden deck in a short time.
For slopes between 4° - 15° it is not necessary to fix the underlayment on overlaps. It is advisable to go with proper metal flashings at the eaves and rakes.
Provide horizontal and vertical overlaps 10 cm between the sheets and make sure to remove the side selvedge release foil. After application use a suitable roller and apply pressure over all overlaps.
The adhesion of Armourbase Thermo AD will start with the application of bituminous shingles by torch-on.
Application of the underlayment on a concrete deck
Apply the membrane parallel with the eaves - vertical and horizontal overlaps should be min. 10 cm. The position of Armourbase Thermo AD on the concrete deck with slopes higher than 15° should be perpendicular to the eaves.
The concrete deck must be primed with the Primer AD (bituminous primer) before the application. Set the roll of Armourbase Thermo AD and remove the release film from the back. In warm, sunny weather the underlayment will stick with the primed concrete deck in a short time. In cold weather you can help to set the Armourbase Thermo AD underlayment with a hot air gun or a torch.
For slopes between 4° - 15° it is not necessary to fix the underlayment on overlaps. For concrete decks with slopes between 15° - 45°, fixation is mandatory. This can be ensured with screws and metal pressure plates for concrete. There is a need to pre-drill holes every 30 cm on overlaps. It is advisable to go with proper metal flashings at the eaves and rakes. Provide horizontal and vertical overlaps 10 cm between the sheets and make sure to remove the side selvedge release foil. After application use a suitable roller and apply pressure over all overlaps.
The adhesion of Armourbase Thermo AD will start with the application of bituminous shingles by torch-on.
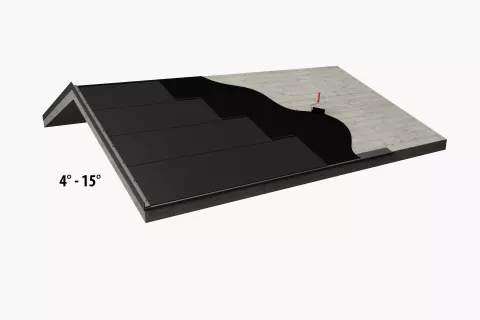
Horizontal "Armourbase Thermo AD" application on low sloped concrete deck (4°-15°)
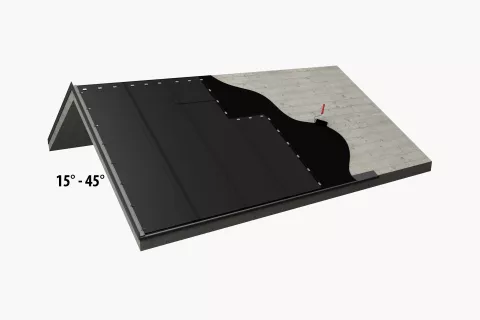
Vertical "Armourbase Thermo AD" application on concrete deck (15°-45°) with mechanical fixing
Contact us for more information on the Armourbase Thermo AD torch on membrane system
Application of bituminous roof shingles on wooden and concrete deck
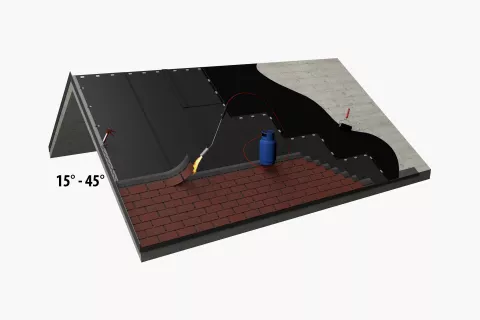
This shingle application is similar to the regular shingle application concept which starts with a starter strip (a shingle with tabs cut off). Apply by heating/flaming the top layer of Armourbase Thermo AD until the polypropylene mat fabric disappears and the top bitumen coating is melted.
Lay the shingle to the melted top adhesive layer of the membrane in its proper place. If necessary, lift the upper part of the shingle with a trowel. Heat up the section of the membrane just underneath the lifted shingle. The back of the shingle should be warmed in order to get the best possible adhesion.
Continue with the diagonal installation of shingles, without using nails. It’s not necessary to torch the shingles from the top. Excessive heat can damage shingles. Essentially shingles are applied for aesthetic reasons only and the waterproofing properties derived from the roofing membrane. For the torch-on method and slopes up to 45° the fixation of shingles with nails is not necessary.
The Armourbase Thermo AD membrane will bring about the total, monolithic adherence between the support and the bituminous shingles.
Torch only on the upper face of the membrane and stick the shingles in the activated Armourbase Thermo AD. Do not torch the shingles!
