
Search
Search
1361 results were found.
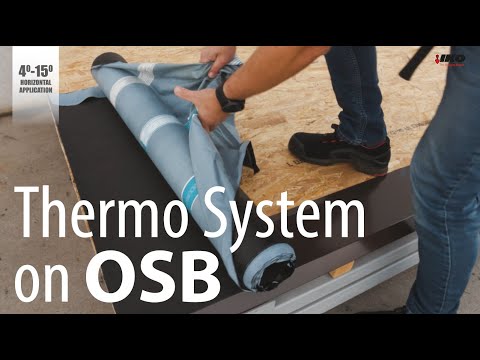
Torch-on application of shingles on OSB wooden deck on slope between 4° and 15°

Torch-on application of shingles on concrete deck on slope between 4° and 15°

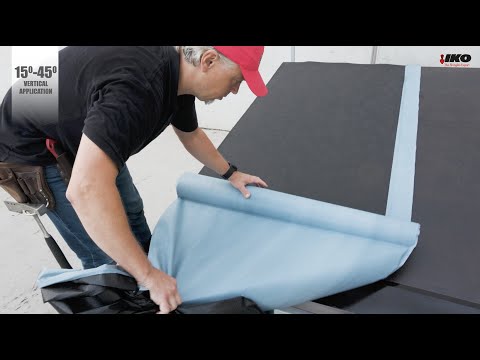
Torch-on application of shingles on concrete deck on slope between 15° and 45°

Hips and ridges on a wooden deck
With hip and ridges, the underlayment is already covered with shingles. Therefore hips and ridges are installed by gluing the parts. For the hip or ridge, the Armourvent Multi ventilation can be applied from a 4° slope.
Armourvent Multi must be glued on both sides with the IKO Shingle Stick and then nailed to the wooden deck. Hereafter the shingle capping will be applied over it the same way as with a roof > 15°.
In special cases, when the insulation is between the wooden deck and shingles (the warm roof) and the pitch of this roof is between 4° - 15°, the mechanical fixing is mandatory.
Then the best and most recommended solution will be to torch APP shingles over this structure.

For slopes between 4° and 15°, IKO recommends installing an extra OSB or wooden wedge and raising the ridge with Armourvent Multi ventilation. This avoids water infiltration in case of ponding water close to this ridge.
Hips and ridges on a concrete deck
On a concrete deck, a piece of 30 cm is trimmed from Armourbase Thermo AD and torched on the top part of the roof over the last rows of shingles. Then the capping can be torched over this membrane. Given the density and thermal mass of concrete decking, ventilation is not required in the air space beneath the deck.

Application on concrete roof deck
Application on wooden roof deck
Underlayment: a crucial part of every roof system
Do you agree that the roof is one of the most important parts of your house, especially as it protects you and your family from bad weather conditions? Let's have a look together to the underlayment shingle that IKO offers.
Take a look at the structure of a correctly installed shingle roof offering protection against all types of weather.
Shingles are not the only part offering protection, everything beneath them does as well. This invisible part is called the roof system. A key component of this roof system is the underlayment. The underlayment of a roof is a water resistant and waterproof membrane which is installed between the shingles and the wooden deck. As it is an extra layer of protection from severe weather conditions, the installation of an underlayment is mandatory. A shingle roof system without an underlayment is not covered by IKO warranty.
<<< Underlayment as part of the roof system

Types of underlayment
There are two basic types of underlayment used beneath roofing materials:
- Bituminous underlayment
- Non-bitumen synthetic underlayment
On the European market most synthetic underlays and breathable membranes are used as diffusion foils beneath wooden decks or wooden battens. They protect the insulation in case water would infiltrate through concrete or ceramic tiles. Diffusion foils cannot be penetrated with nails because the penetration between the membrane and the nail is not 100% watertight.