Search
Search
1361 results were found.
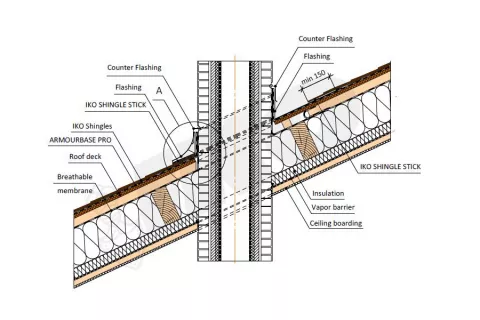
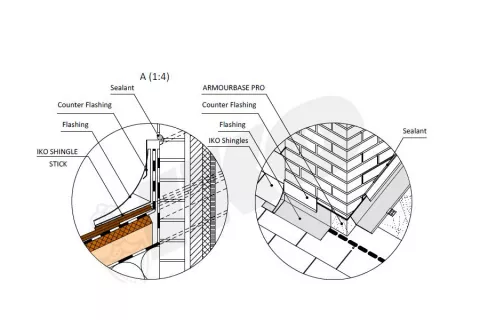
Apply shingles up to the front edge of the chimney section. Then apply the front flashing against the front wall of the chimney. Bend the front flashing so that the lower section extends about 10 cm over the shingles and the upper section extends at least 10 cm up to the front wall of the chimney. Secure the overlaps with plastic roof cement. Use metal step flashings for the sides of the chimney, positioning the pieces in the same manner for a vertical sidewall. Secure each step flashing with bituminous mastic and nails to the wooden deck. Layer the end shingles in each course that overlaps the flashing in asphalt roof cement.
Instead of step flashing you can also install a single continuous metal flashing, which is folded together with the front and back part of the metal flashing. Be sure to turn up a hem on the horizontal roof side and secure the flashing with metal cleats. Do not nail the end shingles in each course through the metal flashing. Secure every ending shingle with bituminous mastic to the hemmed edge of flashing.
Counter and cap flashings
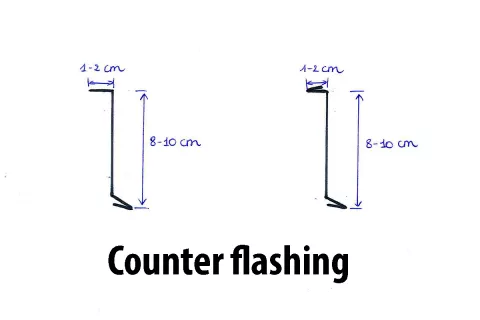
Counter flashing or cap flashing techniques will vary with the type of chimney finish, such as stucco, brick or stone. To keep water out of the chimney joint, begin by setting the counter metal flashing, typically copper, aluminum, or galvanized, into the brickwork or stucco. This is done by cutting out of a mortar joint to a depth of 2-4 cm and inserting the bent edge of the flashing into the cleared joint. Use one continuous piece of cap flashing for the front and one for the back part of the chimney. On the sides of the chimney, use several pieces of similar-sized flashing, trimming each piece to fit the particular location of brick joint and roof pitch. Start the side units at the lowest point and overlap each at least 7 cm side-to-side. This is a typical staggered (stepped) counter flashing for chimney or wall with mortar joints. Refill the joint when the cap flashing is installed with cement mortar, silicone caulk, or use a metal wedge and polyurethane sealant.
The continuous counter flashing technique uses a continuous metal piece instead of stepped counter flashing along the side of a chimney. It is an alternative to stepped counter flashings, which can lead to water leaks along the vertical joints in high wind or fine-grained snow.
Skylights and roof windows
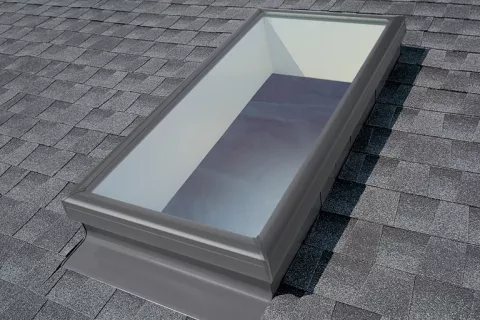
Any glass structure that admits natural light through a roof can be called a skylight. Some manufacturers use the term roof window to describe a relatively large skylight placed low enough to see into the landscape. Roof windows are generally big enough to be considered an escape route in case of a fire.
Many skylight and roof window designs are being sold. Most provide their own instructions for flashing of the curb on which the skylight is mounted. The skylight curb is flashed much like a chimney. Installing self-adhesive underlayment up onto the curb is recommended. An apron flashing with a hemmed lower edge is installed on the base. A step flashing is installed on the sides; base flashing is installed upslope, holding one course of shingles away from the curb to encourage rain to wash away dirt and debris. The skylight itself provides the counter flashing or cap.
Single pitch ridge – shed roof
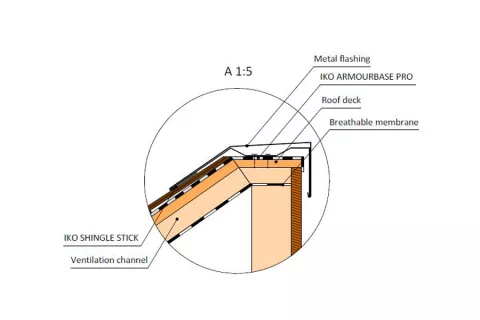
Occasionally, shingles are installed on a single pitch ridge (shed roof). The off flashing on a single pitch ridge turns down and just covers the top edge of the fascia board. It goes over the top and sits on top of the top course of shingles; it appears to have a layer of roofing cement under it.
Roof pitch transitions
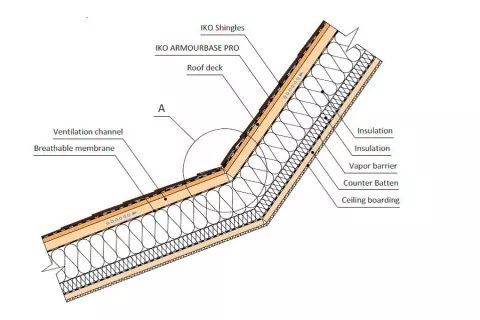
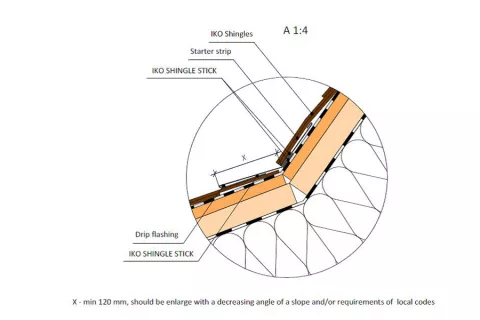
The flashing used for pitch transitions is essentially the same whether the step pitch is on the high side, as in a porch transition, or on the low side, as on a mansard roof. The problem area is the termination of the lower course of shingles, where all the nails must be covered with transition metal strip. Therefore, the flashing must be placed under the shingles of the high slope, and overlap the fasteners on the face of the terminated shingle in the course below the transition.
Metal valley option
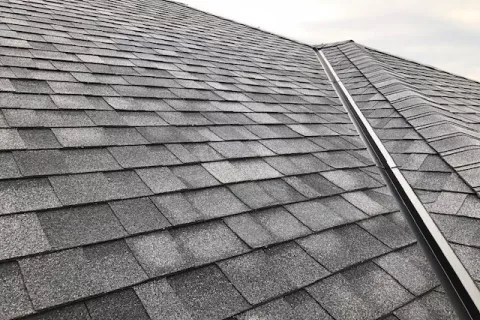
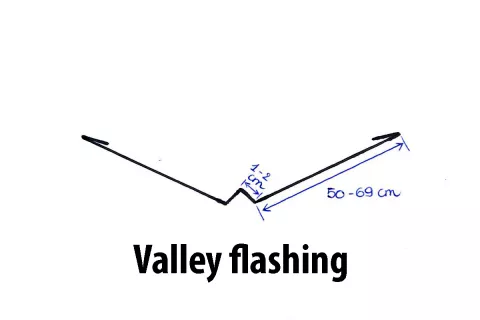
Roof valleys are where two sides of the roof meet, which will be the case in any gable or hip roof that has multiple roof sections. One of the installation options for open valleys is the method with the metal flashing instead of a mineral-surfaced roll. The metal flashing for roof valleys should be minimum 26-gauge (0,45 mm) galvanized steel or equivalent non-corrosive, non-staining metal with a minimum width of 60 cm. If you apply the metal valley flashing with a splash diverter and water guards on the sides which are fixed with the metal cleats, 50 cm width is permitted. Performed “W” style valleys are preferred because the center crimp helps relieve stresses on the metal without forcing the metal to buckle. The “W” shape valleys help to brake and divert water on the sides.
