
Search
Search
1361 results were found.
Drip edge flashing, used on rakes and eaves

Rake flashing, installed on top of the underlayment to prevent wind-driven rain from getting beneath it.

Flashing against a vertical sidewall
Roof planes which are finished against a vertical wall at the end of shingle courses are best protected by metal flashings placed over the end of each course. This method is called “step flashing”.
These requirements for applying step flashing shingles against vertical sidewalls must be followed:
- The width of the step flashing on the deck must be at least 10 cm wide.
- The height of the step flashing installed against the vertical surface must be at least 10 cm high.
- For step flashing application, the pieces of flashing must overlap each other by at least 5 cm.
- The length of the step flashing pieces is approximately 25 cm and depends on the type of shingles being applied.
- The material used for step flashing must be corrosion resistant.

Extend the underlayment approximately 10-12 cm up against the vertical wall. Place the first flashing piece over the end of the starter strip, and finally position it so that the end shingle in the first course covers it completely. Secure the horizontal flange to the roof with two nails. Roofing nails should be placed in the uppermost 5 cm area of the step flashing piece, to avoid leakage. Next, apply the first course of shingles up to the wall. Position the second step flashing piece over the end shingle in the first row cover head-lap of the shingle. This will permit the shingle in the second course to cover it completely. Always use some bituminous mastic to bond down the shingles and step flashing. The second course of shingles follows and the end is flashed as in previous courses. Continue up the roof or sidewall area in a similar manner.
Side wall flashing can also be installed as a single continuous piece. This is common against stucco walls and with tile roofing. Be sure to turn up a hem (water stopper) on the horizontal roof side of the flashing. Metal flashings are fixed with the small clips to the roof. When you apply the shingles, do not nail the shingles through this metal profile but glue the end of every shingle on the profile edge.

Counter flashing
Counter flashing or cap flashing must be installed, lapping the step flashing or continuous metal flashing, so that water cannot run into the joint. This is done by raking out the mortar joint to a depth of 2-4 cm, inserting the bent edge of the flashing and refilling with mastic. The length of the counter flashing depends on the roof pitch and the brick size. Always start at the lowest point, overlapping each by at least 7 cm. Cap flashings can also be made as a one continuous piece.

Flashing against vertical front wall
Apply shingles up the roof until a course must be trimmed to fit the base of the vertical wall. By planning you can slightly adjust the expansion in the previous courses, so that the last row is about 15-20 cm wide. Apply a continuous piece of metal flashing over the last course of shingles by embedding it with bituminous mastic and nailing it to the roof. Do not nail the strip to the wall. The metal flashing strip should be bended to extend about 10 cm up the vertical wall and 10 cm onto the last shingle course. Applying an additional row of shingles over the wall flashing strip on the shingle surface is optional. The last pieces of shingles must be fastened with face nails sealed over with a small dab of roofing cement. The top part of wall flashing can be placed under the siding or covered by a counter flashing (stucco wall).


Soil stacks and vent pipes
Normally homes have circular vent pipes or ventilators projecting through the roof. Before installing the flashing or roofing accessory, bring the shingles up to the vent pipe. Then cut a hole in the shingle that will go over the vent pipe and set it in bituminous mastic. Be sure the flange or vent is positioned squarely on the roof. Avoid excessive use of mastic because it may cause blistering.
After the flashing is in place, continue applying the shingles. Cut the shingles in their successive courses to fit around the pipe and seal them with bituminous mastic where they overlap the flashing flange. The lower part of flashing is overlapping the lower shingles, and the sides and upper shingles are overlapping the flange. Remember, do not nail close to the pipe. Follow the same procedure where a ventilator or exhaust stack is located.

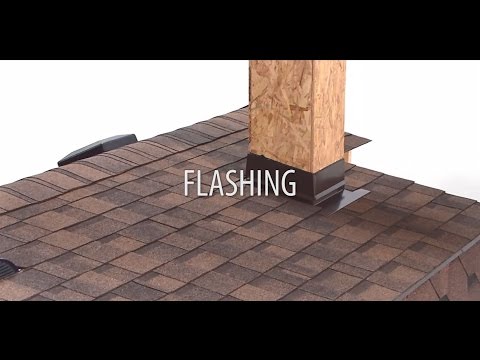
Flashings around chimneys
Because chimneys are usually built on an independent foundation that is separated from the main house foundation, the chimney can move independently of the rest of the house. To allow for chimneys and deck movement, the base flashing is secured to the roof deck and counter or cap flashing is secured to the chimney. When movement occurs, the base flashing and counter flashing will act as a movable joint. For chimneys projecting through the roof surface which are greater than 76 cm, we recommend placing a cricket behind the chimney. The cricket, sometimes called a wooden saddle, consists of two triangular sections of decking material (plywood, OSB, wooden boards) joined to form a level ridge that extend from the centerline of the chimney back to the roof deck. A cricket prevents the build-up of ice and snow at the rear of the chimney and diverts water runoff around the chimney. It also prevents water from ponding and backing up under the shingles during winter freeze or thaw periods. All roofing materials from the underlayment to the roofing shingles are applied over it.
