Search
Search
1361 results were found.
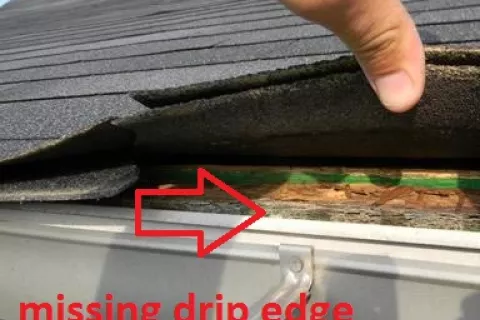
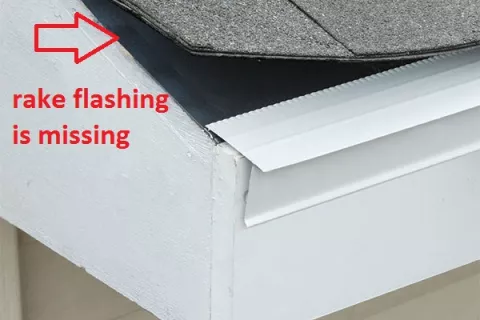
5. No or improper applied underlayment
The application of an underlayment provides benefits to the roof system at the deck and shingle components. These benefits add to the long-term weatherproofing success of the roof system. The most building codes require the application of an underlayment for pitched roofs. Shingle roofs without an underlayment or without proper overlapping mean high risks for wind driven water close by roof details (valley, chimney, skylight, spot vents, pipe flange etc.). When installing on a slope between 9.5° and 20°, it is very important to install double coverage with 50 cm overlaps or one layer of a self-adhesive underlayment!
Solution:
No action is needed if you do not have leakage problems. If you are experiencing water infiltration, try to fix the leak and start to think about a new roof.
Interested in the product mentioned in this blogpost?
Providing a solid roof starts at the base: a roof deck suitable for the nailing and installation of shingles. The type, grade, thickness and installation of materials used for roof decks should conform to the requirements of the relevant local building codes of practice and regulations.
The roof deck should be a stable, smooth and solid surface where shingles can be easily and, more important, securely installed. The roof deck must be strong to:
- Support the roofing materials and workers.
- Safely resist impact loads, such as a pile of shingles.
- Hold constant loads, such a heavy snow.
- Provide resistance to wind force.
- Anchor the nails.
All of these conditions must remain effective during the service life of each application of shingles.
Let’s take a look at 3 roof deck materials we suggest.
1. Sheathing boards or plywood
Sheating boards are made from thin layers of wood adhered together, each with its grain at right angles to adjacent layers for greater strength and dimensional stability. Usually there are an odd number of layers so that the grain of the outside layers run together.
Points of attention during installation:
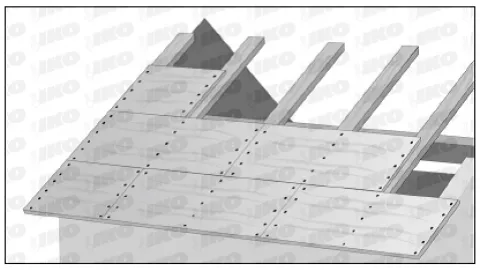
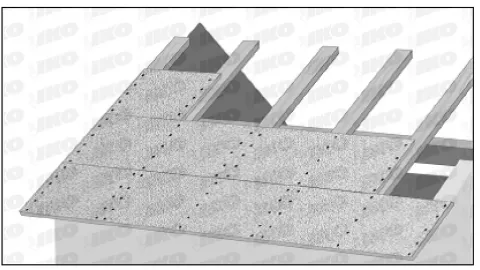
- Install the boards with staggered vertical joints, parallel to the ridgeline. The vertical joints between boards must be supported along the whole length and nailed down well.
- Ensure sufficient support with a maximum of 600 mm in between two rafters.
- Plywood panels should be installed with 3 mm spacing between them (unless stated otherwise by the manufacturer).
2. Oriented strand board (OSB)
Cross-orientated layers of thin rectangular wooden strips or strands, compressed and bonded together with waterproof exterior-grade binders, are formed into wide mats. The layers are oriented like plywood and may have three to five layers. The outside layers are longitudinally arranged to increase the strength and stiffness in the direction of the alignment, that is, the long direction across the rafters or trusses.
OSB is available for structural applications and for non-load-bearings uses. In Europe there are two basic grades available which are suitable for shingled roof structures.
- OSB/3: For load-bearing applications in humid conditions.
- OSB/4: For heavy-duty load-bearing applications in dry or humid conditions.
For shingled roof structures only, OSB/3 or OSB/4 can be used. The OSB panels should be also installed with 3 mm spacing between them. It is not necessary with tongue & grove locking system. Remember, panels can absorb some moisture, and then expand which can cause buckling, ridging or sagging.
3. Wood boards
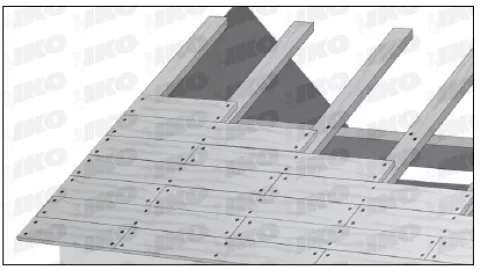
Instead of sheathing boards, solid wooden boards can be used as well. However, to minimize the effects of distortion, make sure that the boards are not wider than 150 mm and approximately 24 mm thick.
It is important to stagger the board joints. When a number of adjacent boards join on the same support/rafter, it is possible for deck movement due to distortion to a crack line in the shingles. All wood boards must be properly conditioned to be at moisture equilibrium. Never use undried, recently stripped, concrete-form lumber.
The number of fasteners should be sufficient to prevent buckling. Each board must be fastened with at least two nails in each rafter.
The thickness of the roof deck in relation to the span
During fastening of the wooden roof constructions, the roof rafter spacing depends on temporary and constant roof loads an on form of roof. It ranges from 600 mm up to 1500 mm. Depending on the roof rafter spacing, different preparatory layers of different thicknesses and materials are used. Please check your local building codes or static calculations. The following table is only a guideline.
| Roof rafter spacing (mm) | Min. thickness of plywood (mm) | Min. thickness of OSB-3 (mm) | Min. thickness of board (mm) |
| 600 | 12 | 12 | 20 |
| 900 | 18 | 18 | 23 |
| 1200 | 21 | 21 | 30 |
| 1500 | 27 | 27 | 37 |
Tips reducing the problem of wooden deck
- Properly ventilate the attic. This eliminates the amount of moisture absorption by deck panels and thereby reduces the amount of swelling and shrinking of the wood. This wood movement often causes the the buckling problems with shingles.
- Leave the roof sheathing panels (plywood, OSB) to acclimate to local humidity levels before installation. This reduces swelling after the panels are installed and avoid buckling problems with shingles.
- Space deck panels 3 mm apart on all sides when fastening them to the roof framing.
- Immediately cover the roof panels with an underlayment after installation in order to keep the wood dry.

